
When someone appoints you as their attorney-in-fact under a Power of Attorney (POA), you can legally sign legal documents on their behalf if necessary. However, signing on the principal’s behalf isn’t as simple as writing down both of your names.
Read on to learn how to take the proper steps and correctly sign as the power of attorney, so you can avoid any issues when signing documents on someone’s behalf.
What Is a Power of Attorney?
A power of attorney is a document that creates a legally binding agreement between two parties — a principal and an attorney-in-fact (also called an agent).
A power of attorney document grants an attorney-in-fact the right to:
- Access the principal’s financial accounts;
- Sign legal documents on the principal’s behalf;
- Manage the Principal’s legal and business affairs.
As an attorney-in-fact, you must act in the principal’s best interest and adhere to their wishes when signing documents. This means doing what the principal wants you to, no matter what.
A durable power of attorney form remains effective if you become incapacitated and unable to communicate your wishes.
If loved ones suspect an agent isn’t acting in the principal’s best interests, they can take steps to override the power of attorney designation.
How to Sign as Power of Attorney (6 Steps)
Acting as someone’s attorney-in-fact can be complicated. The steps below ensure the signing process runs smoothly and meets legal requirements.
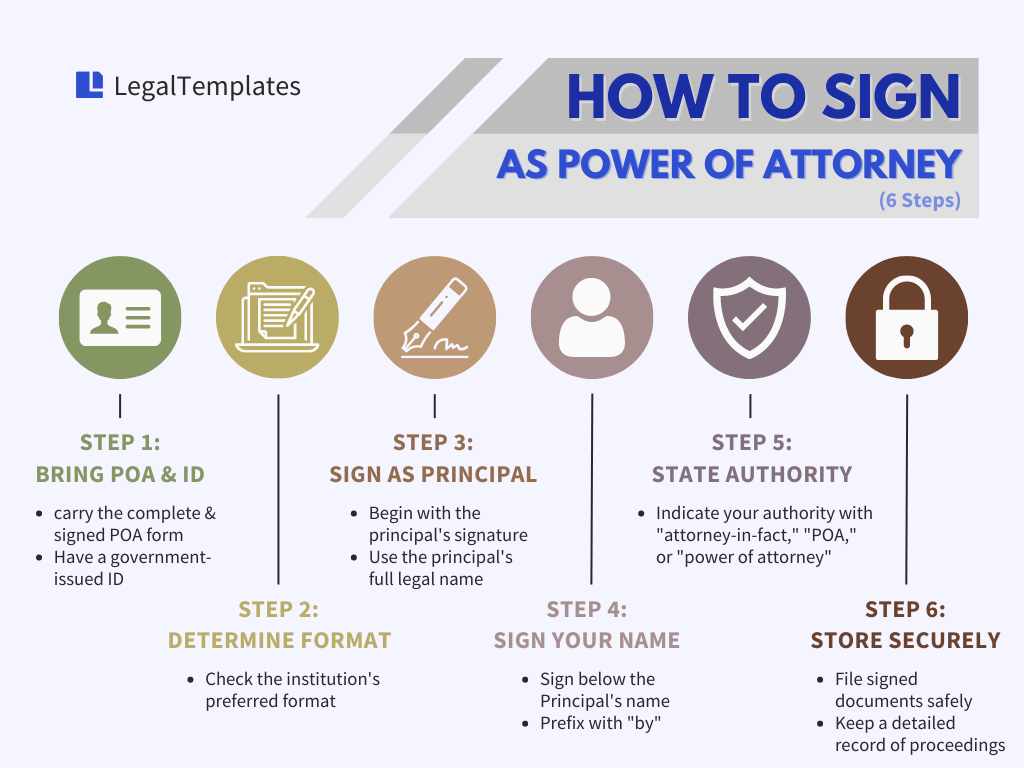
Step 1: Bring Your Power of Attorney Agreement and ID
When signing as a POA, you must bring the original or a copy of the complete and signed power of attorney form to the meeting — even if you’ve previously submitted or filed a copy of the document with the institution (such as a bank, financial agency, or government institution).
You must also bring government-issued photo identification (i.e., driver’s license). Your ID lets the institution confirm that you’re the person named in the power of attorney and verify your signature is authentic.
Step 2: Determine the Preferred Signature Format
Most agencies or institutions require a specific format when signing under a Power of Attorney. Consider calling ahead to establish what format is preferred — if any.
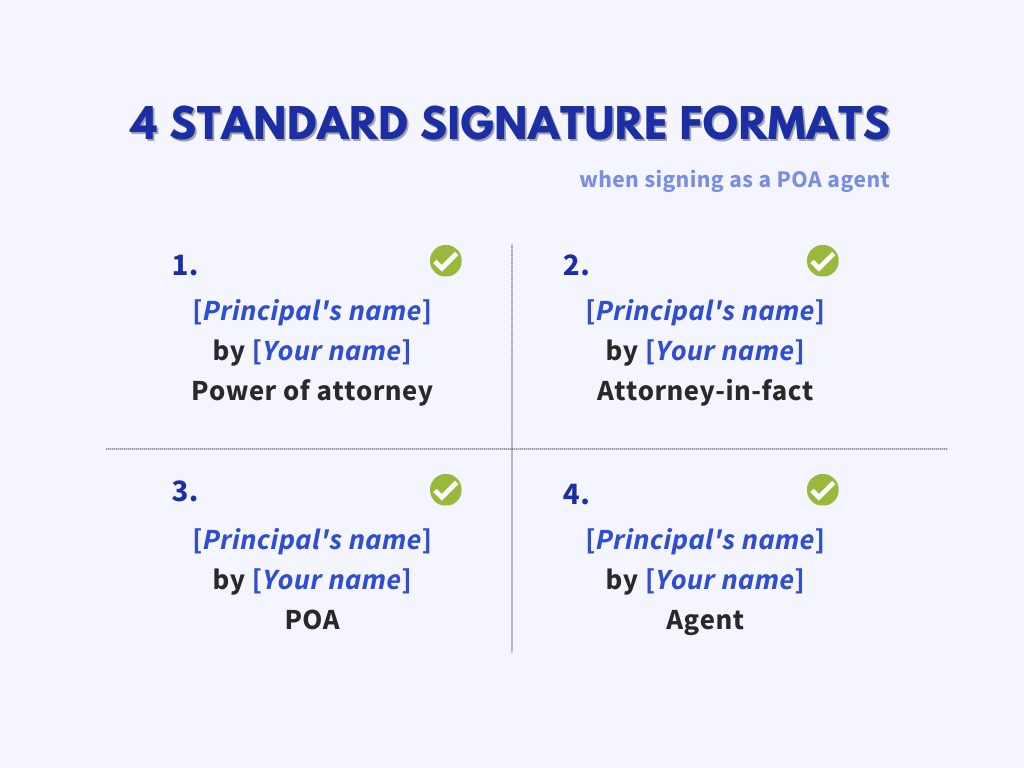
If there’s no preference, use a standard format such as the one in the signature sample below:
Step 3: Sign as the Principal
First, the proper way to sign a Power of Attorney is to write the Principal’s signature. This shows that you’re acting on the principal’s behalf, not your own.
And remember to use the principal’s full legal name. If you see their name listed on any pre-existing paperwork at the institution, replicate its format.
Step 4: Sign Your Name
Sign your name below the principal’s name. Add the word “by” in front of your name to indicate you’re signing as POA on the principal’s behalf.
Step 5: Express Your Authority as Attorney-in-Fact
Below or next to your name, make it clear that you have the authority to sign on the Principal’s behalf. To indicate that you’ve been given signing authority, write “attorney-in-fact” under or next to your name. Other variations, like “agent”, “POA” or “power of attorney” are also acceptable.
Failing to indicate that you’re signing on the Principal’s behalf under a power of attorney can invalidate the agreement and even lead to civil or criminal lawsuits.
Here’s a sample of what a power of attorney signature should look like:

Step 6: File the Documentation Somewhere Safe
The final step is to file each document you’ve signed in a secure location.
Knowing you have the authority and responsibility to sign as a Power of Attorney for a loved one or a family member can be challenging, but it can be a simple task if you prepare accordingly.
Be sure to follow any directions while maintaining a clear record of the proceedings for future use.
You should note that the law prohibits using a Power of Attorney after the Principal’s death.
