What Is a Plumbing Invoice?
A Plumbing Invoice is a crucial document for any plumbing business. It serves as a professional and organized way to request payment for services rendered. Not only does it help with bookkeeping, but it also provides legal protection during tax season. An effective invoice should clearly communicate payment information to customers and showcase your business’s professionalism. By sending a well-crafted invoice, you can ensure that you get paid promptly and maintain a positive relationship with your clients.
When to Use
There are several situations when you should use a plumbing invoice:
- Residential plumbing
- Commercial plumbing
- Service and repair
- Water supply plumbing
- Sanitary plumbing
- Construction plumbing
How to Use
Creating a tailored invoice template is crucial for plumbers to maintain organization and professionalism. Here are some steps to follow:
1. Provide a detailed breakdown of the services you provided: Start by specifying the services rendered, including the amount of time it took, any replacement parts used, and the cost of labor. This level of detail will make it easier for clients to understand the charges and will help avoid any confusion or disputes later on.
2. Include your contact information on the invoice: This includes your name, phone number, and email address. Providing your contact information will make it easier for clients to get in touch with you if they have any questions or concerns about the invoice.
3. Make sure the pricing is clear: List your prices clearly on the invoice, ensuring that they are consistent with any quotes you provide. You can also provide a breakdown of prices for each service provided so that clients can see exactly what they are paying for.
4. Provide a payment due date on the invoice: This can be a specific date or a certain number of days from the date of the invoice. If payment is not received by the due date, be sure to follow up with the client.
5. Be transparent about any additional charges that may apply: For example, if you had to travel a long distance to provide services, you may want to include a travel fee on the invoice. Make sure that any additional charges are clearly listed so that clients can see exactly what they are paying for.
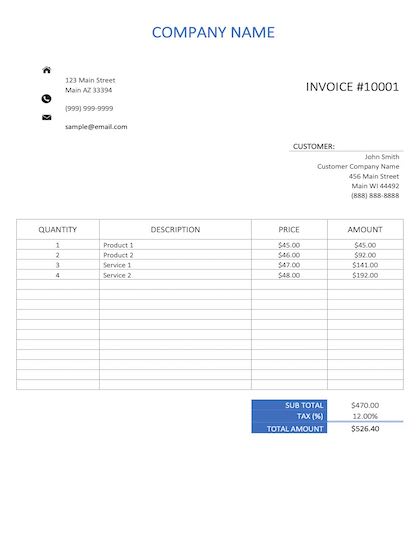
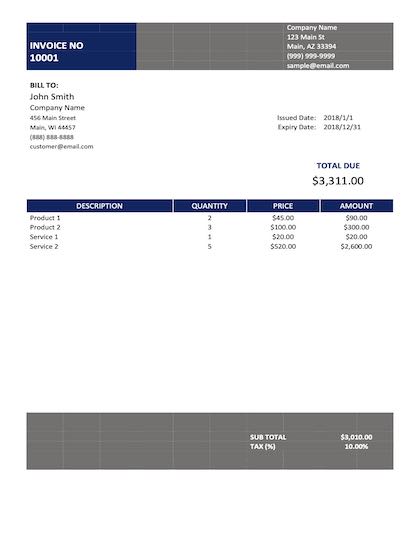
Sample Plumbing Invoice
Download in Excel or Word format: